Bench Press Arch vs. Flat Back: Maximize Strength & Muscle (Science Explained)
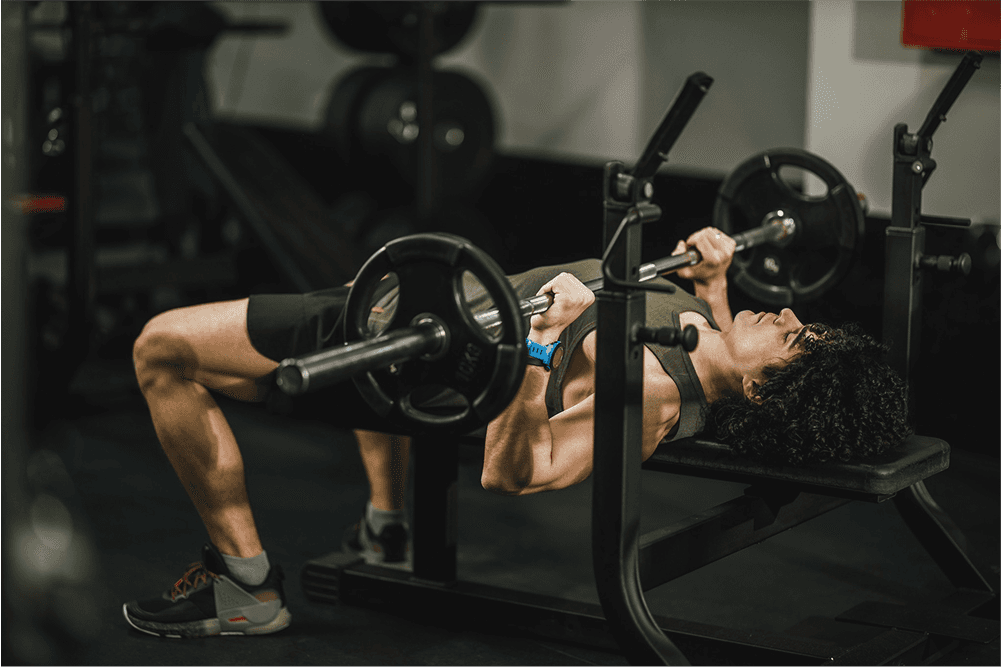
The bench press. It's a cornerstone of strength training, but one question sparks endless debate online and in gyms worldwide: should you bench press with an arched back or keep it flat? You've likely seen powerlifters with significant arches moving massive weight, while others advocate for a flatter back, often leading to confusion about the "right" way to bench.
The truth is, the optimal technique isn't one-size-fits-all. It depends on your goals, comfort, skill and any competition rules, whether you're chasing maximum strength, building muscle mass, or focusing on general fitness. This article cuts through the noise, examining the biomechanics, scientific evidence, and practical implications of both the arched-back and flat-back bench press techniques to help you choose the best approach for your goals.
Understanding the Techniques: Arched vs. Flat Back
Let's break down the two primary styles:
The Arched-Back Bench Press: Built for Strength
Powerlifters frequently employ a noticeable back arch, and for good reason – it can improve leverage for competition bench pressing when performed within that federation’s rules.
Why Arch? The Benefits:
Reduced Range of Motion (ROM): Arching elevates the chest and retracts the shoulder blades, significantly shortening the distance the barbell travels from the chest to lockout. Less distance means less work per rep, allowing you to handle heavier loads.
Increased Stability: A proper arch involves driving the upper back (specifically the traps) into the bench and retracting the shoulder blades. This creates an incredibly stable platform to press from, engaging the lats and upper back musculature. This stability is crucial for controlling heavy weight.
Shoulder positioning: a firm scapular position can help make a setup repeatable. Biomechanical models can compare loading under different positions, but they do not prove a technique prevents shoulder injury.
Enhanced Leg Drive: A stable, arched position allows for more effective transfer of force generated by driving your feet into the floor (leg drive).
What the Science Says:
A 2024 study in 15 highly trained lifters found an average 4.2 kg higher 1RM with the arched setup and a longer bar displacement with the flatter setup. Pectoral EMG was similar. This was an acute performance comparison; it did not measure long-term chest growth or injury rates and cannot predict the gain from changing your own technique.
Is Arching "Cheating" or Dangerous?
Arching is permitted under some competition rules, but an arch is not automatically a legal lift. The IPF rules effective 1 March 2026 also require head, shoulders and buttocks contact, flat feet, the required grip and commands, and the underside of both elbows reaching at least the level of the top of the respective shoulder joints at the bottom. Other federations can differ. No technique eliminates spinal or shoulder loading; use a controllable setup rather than forcing an extreme arch.
The Flat-Back Bench Press: Focus on Hypertrophy?
This technique involves maintaining a more neutral spine, keeping the lower back closer to or flat against the bench. It's often favored in bodybuilding and general fitness routines.
Why Stay Flat? The Benefits:
Potentially greater bar travel: A flatter setup produced longer displacement in the cited acute study. That study did not measure long-term chest growth, and similar EMG cannot establish equal hypertrophy.
Simplicity: For beginners, the flat-back technique can feel less complex, allowing focus on fundamental pressing mechanics without mastering the arch setup.
Higher Bar Velocity (Lighter Loads): Some research suggests that the flat-back technique might allow for greater bar speed when using lighter percentages of 1RM (e.g., 50%), which could be relevant for explosive power training.
Considerations:
A flatter setup can still use a firm upper-back position and stable contact points. Choose a repeatable position you can control; neither “flat” nor “arched” alone identifies a safe or unsafe lift.
How to Perform Each Technique: Key Differences
While the core pressing motion is similar, the setup distinguishes the two styles:
Flat-Back Setup:
Position: Lie flat on the bench, ensuring the 5 points of contact: head, shoulder blades, glutes, and both feet firmly on the floor. Maintain a neutral spine; a very small natural curve in the lower back is acceptable, but avoid actively arching.
Shoulder Blades: Actively pull shoulder blades down and slightly back for stability.
Grip: Typically slightly wider than shoulder-width.
Feet: Planted firmly to provide a stable base.
Arched-Back Setup:
Position: Lie on the bench. Actively drive your traps/upper back into the bench while simultaneously trying to bring your shoulders towards your glutes. This creates thoracic extension (the arch). Maintain head, upper back/shoulders, and glute contact.
Shoulder Blades: Set a firm, comfortable position for the shoulder blades ("down and back") to create maximum upper back tightness.
Grip: Varies based on preference (wider grips shorten ROM more, narrower grips may use more triceps).
Feet: Positioned firmly on the floor (flat if following IPF rules; check your federation’s requirements) further back towards the hips to support the arch and facilitate powerful leg drive.
Execution (Both Styles):
Unrack: Brace your core, take a deep breath, and unrack the bar, bringing it over your chest.
Lower: Control the descent, lowering the bar towards your mid-to-lower chest. Keep elbows tucked (generally 45-70 degrees from the torso, not flared out to 90 degrees).
Press: Drive your feet into the floor, maintain tightness, and explosively press the bar up and slightly back towards the starting position over your shoulders. Exhale during the press.
Lockout: Finish with arms fully extended but maintain shoulder blade position (don't let shoulders roll forward).
Which Bench Press Form is Best for You?
The optimal choice boils down to your primary objective:
Choose the Arched-Back Technique if:
Your main goal is maximizing your 1RM / lifting the absolute heaviest weight possible (e.g., powerlifting).
You want to optimize stability and leverage for heavy lifts.
You find a controlled arch comfortable and repeatable for your pressing goal.
Choose the Flat-Back Technique if:
You prefer a flatter, controlled setup and a repeatable range for general pressing practice.
You are comparing lighter-load bar speed while keeping the technique consistent; the acute study found no power advantage.
You are a beginner focusing on mastering basic pressing mechanics.
Keep a firm, repeatable upper-back position, stable feet and the chosen contact points for either technique. Use suitable safeties or competent spotting; scapular retraction is not proof that an injury cannot occur.
Track Your Progress with Setgraph
Whichever technique aligns best with your goals, tracking your progress is key to consistent improvement. Setgraph allows you to create and log separate exercises for both arched-back and flat-back bench presses.This lets you objectively measure your performance with each style, monitor strength gains over time, and ensure you're effectively working towards your lifting targets.
Conclusion
An arch can change leverage and bar travel and may suit competition goals within the applicable rules. A flatter setup is another option. The cited acute study does not establish a long-term muscle-growth or injury-prevention winner. Choose a tolerable, repeatable position and compare like sessions.
How Much Does an Arch Add?
There is no universal 5–15% increase or fixed 2–4-inch reduction in bar travel. In the 2024 comparison above, the average 1RM difference was 4.2 kg in 15 trained lifters. Your response depends on the setup and skill with it; do not treat the study average as a promised personal gain.
Compare sessions using the same grip, pause, contact points and range of motion. If you change technique, establish a new baseline instead of interpreting the immediate difference as new muscle or strength.
Common Arch Mistakes to Avoid
Forcing an extreme arch: Build a comfortable upper-back setup while maintaining the required contacts. Do not try to reach an arbitrary arch height or force painful lumbar extension.
Losing glute contact: Keep the buttocks in contact with the bench for this setup; IPF competition rules require it. Check your own federation rather than assuming every rulebook is identical.
No bracing: Take a big breath into your belly and brace before you unrack. A loose torso wastes the leverage the arch creates.
Frequently Asked Questions: Arched Back Bench Press
Is arching cheating?
Not by itself. In IPF competition, an arched setup must still satisfy contact, foot, grip, command and elbow-depth requirements. Check the rules for the competition you enter.
Is arching bad for your back?
Neither an arched nor flatter setup is universally safe or harmful. Do not force a painful position. The cited performance study did not establish injury risk or prove that the lumbar spine is unloaded.
Which is better for muscle growth?
The acute study found similar pectoral EMG, but EMG is not a long-term hypertrophy test. Choose a controlled, tolerable setup with a repeatable range that fits your goal.
Will an arch increase my bench press?
It may improve leverage, but there is no guaranteed percentage gain. Practice with appropriate loads, and compare the same technique across sessions.
For related programming, see the push-day guide and strength versus hypertrophy.
