How to Track Workout Progress: 5 Practical Methods

Why Tracking Workout Progress Matters
You can track workout progress with a journal, an app, progress photos, body measurements or repeatable performance tests. For a simple starting point, record each exercise, sets, reps and load, then compare the next similar session. Add other measures only when they help answer your goal.
A workout log creates a record you can compare: the same exercise, load, repetitions, technique and rest from one session to the next. It can help identify patterns, but it does not prove that one program change caused a result.
Your record can show what changed alongside your training. For example, note a change from three to four training days and compare performance, fatigue and attendance over time. That gives you questions to investigate rather than proof that frequency alone caused the result.
Progressive overload means increasing training demands as your capacity improves. A log makes that process easier to review; progress can still happen without tracking every number.
Key Metrics to Track for Different Fitness Goals
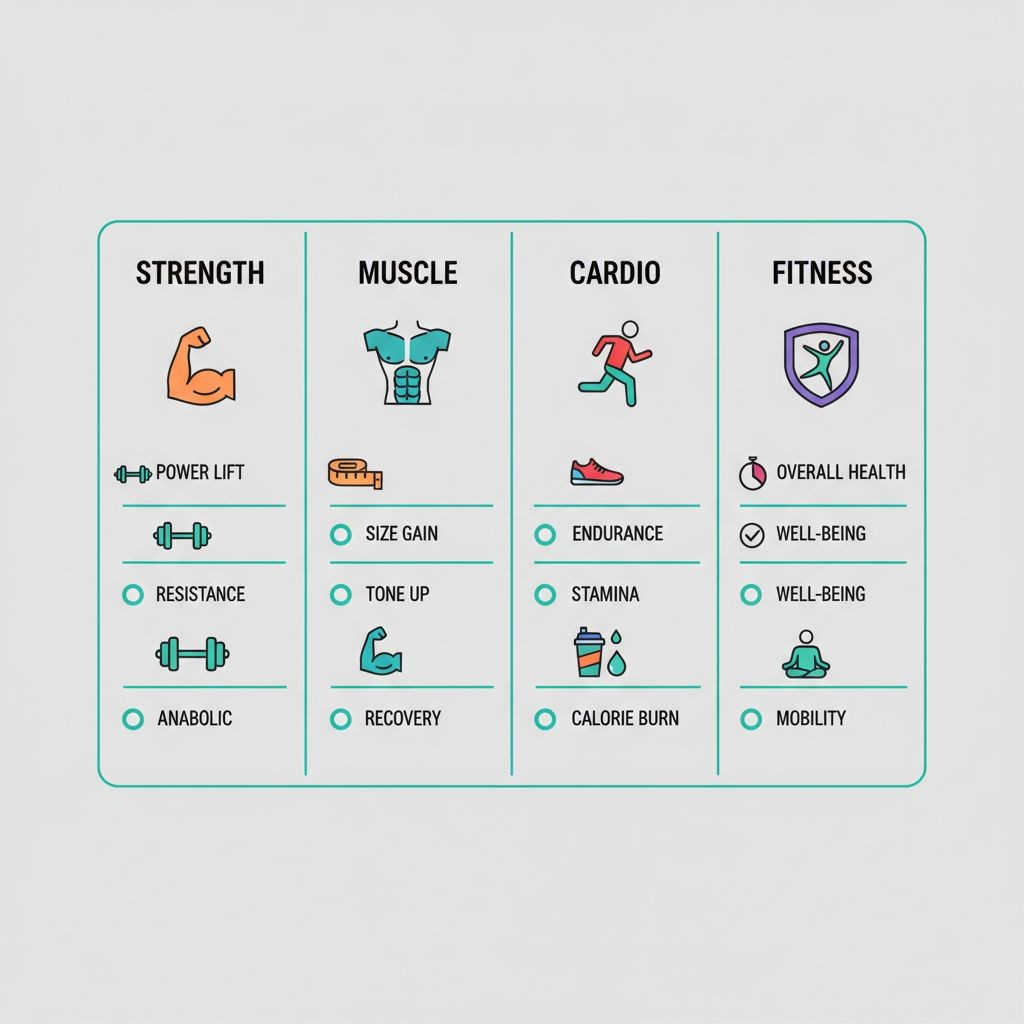
Not all metrics matter equally for everyone. What you track should align with what you’re trying to achieve.
For Strength Training
If you’re chasing bigger lifts, focus on:
Load and repetitions for each exercise
Working sets, with warm-ups distinguished if useful
A consistent technique and range of motion
Rest between sets
Optional estimated 1RM trends, with the formula and rep range kept consistent
For Muscle Building
Bodybuilders should prioritize:
Working sets per muscle group each week
Performance at a comparable load, technique and effort
Optional body measurements taken consistently
Longer-term trends rather than pump or a single body-fat reading
For Endurance and Cardio
Runners, cyclists, and cardio enthusiasts need:
Distance covered: Track weekly and monthly totals
Pace/speed: Average and peak performance
Heart rate zones: Time spent in different intensity zones
Recovery heart rate: How quickly your heart rate drops post-exercise
Perceived exertion: Rate of 1-10 for each session
For General Fitness
If you’re training for overall health:
Workout frequency: Days per week you exercise
Session duration: Time spent actively training
Energy levels: Pre and post-workout ratings
Sleep quality: Recovery is part of progress
Consistency streaks: Days or weeks without missing workouts
Method 1: Workout Journal and Logbook
A notebook gives you a flexible, low-tech record. Its usefulness depends on whether you can log and compare your sessions consistently.
How It Works
Grab a dedicated notebook and record each workout session. At minimum, log:
Date and time
Exercises performed
Sets and reps
Weight used
How you felt (optional but valuable)
A typical entry might look like:
Monday, Nov 4, 2024 - Push Day
Bench Press: 185lbs × 8, 185lbs × 7, 185lbs × 6
Incline Dumbbell Press: 60lbs × 10, 60lbs × 9, 60lbs × 8
Cable Flyes: 40lbs × 12, 40lbs × 12, 40lbs × 10
Notes: Felt strong on bench, might try 190lbs next week
Best For
People who prefer tactile experiences, those who want complete control over their tracking format, and lifters who don’t want to depend on technology during workouts.
Pros and Cons
Pros:
No battery required
Completely customizable
No learning curve
Creates a physical record you can flip through
Zero distractions from notifications
Cons:
Easy to forget or lose
Harder to analyze trends over time
Can’t easily share with trainers or workout partners
Takes more time to write everything out
Getting Started
Pick up a durable notebook that fits in your gym bag. Create a simple template on the first page that you can reference. Some people use bullet journals with custom layouts, while others prefer simple lined notebooks. The key is consistency—use the same format every time so you can quickly compare sessions.
Method 2: Fitness Tracking Apps and Technology
Welcome to the digital age of fitness tracking. Apps have transformed how we monitor progress, offering features that paper simply can’t match.
How It Works
Look for the capabilities you need rather than assuming every app includes them:
Create custom workout routines
Log sets, reps, and weight with a few taps
View your exercise history instantly
Track rest times between sets
Analyze progress with charts and graphs
Wearable integration for the data you need, where supported
For strength training specifically, apps like Setgraph are designed to make logging fast and intuitive. You can see your previous performance for any exercise before starting your next set, which helps you make informed decisions about weight and rep targets.
Best For
Tech-savvy individuals, people who want detailed analytics, those following structured programs, and anyone who always has their phone at the gym anyway.
Pros and Cons
Pros:
Convenient access to saved exercise history
Calculations and charts where supported
Rest timers where available
Export or sharing options to check before relying on them
Backup and account-recovery options that vary by service
Plan-generation tools in some apps
Cons:
Requires phone battery
Can be distracting if notifications aren’t silenced
Learning curve for feature-rich apps
Some premium features require subscriptions
Dependent on the app continuing to exist
Getting Started
Start with three to five exercises you do regularly and log them consistently for two weeks. Once that feels manageable, expand to the rest of your workouts. Learn the entry shortcuts your chosen app offers, and check that saved values match what you completed.
Method 3: Progress Photos and Visual Documentation

Illustrative image showing a repeatable photo setup; it is not a documented customer transformation.
Numbers don’t tell the whole story. Sometimes you need to see the changes to believe them.
How It Works
Take standardized photos of yourself at regular intervals—typically every 2-4 weeks. The key word is standardized:
Same lighting that you can reproduce
Same time of day and similar relation to meals and exercise
Same poses (front, side, back)
Same location and distance from camera
Same clothing (or lack thereof)
Same flexed/relaxed state
Different lighting, pose or camera distance can make a visual comparison misleading. Use a repeatable setup, and do not treat a photo as a precise measure of muscle or fat.
Best For
People focused on body composition changes, those who find scale weight demotivating, visual learners, and anyone doing a body transformation.
Pros and Cons
Pros:
Adds a visual record alongside scales and measurements
Can be motivating when change becomes visible
Lets you compare appearance under similar conditions
Keeps a dated record you can review
Can reveal changes during periods when weight stays stable
Cons:
Requires privacy and comfort with photos
Changes can be subtle week-to-week
Lighting and angles can be deceiving
Doesn’t provide quantitative data
Can be discouraging if you’re too critical
Getting Started
Set a reminder at an interval that suits you, such as every four weeks, and keep the images in a private folder. Use the same views and setup each time. Visible change may take longer than a month; skip photos if they are unhelpful or make you overly critical of your body.
Method 4: Body Measurements and Composition
Scale weight, circumference and body-composition estimates measure different things. Use them in context rather than treating one reading as the whole picture.
How It Works
Use a flexible measuring tape to track circumference measurements of key body parts:
Neck
Shoulders (widest point)
Chest (at nipple line)
Waist (at belly button)
Hips (widest point)
Thighs (mid-thigh)
Calves (widest point)
Arms (flexed bicep peak)
Measure at the same time of day, ideally first thing in the morning. For body composition, you have several options:
DXA: estimates body composition with equipment and a standardized protocol
Bioelectrical impedance: convenient, but affected by hydration and other conditions
Skinfold measurements: depend on technique and the equation used
Circumference: useful for repeatable size measurements, not a direct measure of muscle or fat
Best For
People who want objective data beyond weight, those building muscle while losing fat, individuals who get discouraged by scale fluctuations, and serious athletes tracking body composition changes.
Pros and Cons
Pros:
Adds size information alongside scale weight
Provides numbers you can compare under similar conditions
Can be relatively quick with a small set of measurements
Still cannot isolate muscle gain or regional fat loss on its own
Cons:
Requires consistency in measurement technique
Small measurement errors can skew data
Body composition methods vary in accuracy
Can be time-consuming to measure everything
Daily fluctuations from water retention
Getting Started
Invest in a quality fabric measuring tape (not the metal kind). Watch a few YouTube videos on proper measurement technique—placement matters. Measure every 2-4 weeks, not daily. Create a simple spreadsheet to track measurements over time. If you’re using body composition testing, stick with one method for consistency rather than switching between different technologies.
Method 5: Performance-Based Metrics
Sometimes the best progress indicator is what you can do, not what you look like or what the scale says.
How It Works
Track performance benchmarks specific to your training:
For Strength:
Max reps at a specific weight
Total weight moved in a session (volume load)
Time to complete a fixed workout
Ability to maintain form at higher weights
For Endurance:
Mile time or 5K pace
Distance covered in 30 minutes
Heart rate at specific paces
Recovery time between intervals
For Functional Fitness:
Number of pull-ups or push-ups
Plank hold duration
Box jump height
Flexibility measurements (sit-and-reach test)
For Sports Performance:
Sprint times
Vertical jump height
Agility drill times
Sport-specific skill tests
Best For
Athletes training for specific performance goals, people who find aesthetic goals demotivating, functional fitness enthusiasts, and anyone who wants objective capability measurements.
Pros and Cons
Pros:
Measures performance on the chosen task
Highly motivating to beat personal records
Relevant to real-world activities
Can be compared when the test conditions are consistent
Provides clear goals to chase
Cons:
Requires periodic testing sessions
Can be fatiguing to test maximal performance
Some tests need specific equipment
Progress may plateau in certain metrics
Doesn’t directly measure body composition
Getting Started
Choose a few benchmarks relevant to your goal and repeat them at sensible points in your program, such as the end of a training block. Record the test setup and relevant context. You can also compare ordinary submaximal sets without adding a separate maximal testing session.
How to Analyze Your Tracking Data
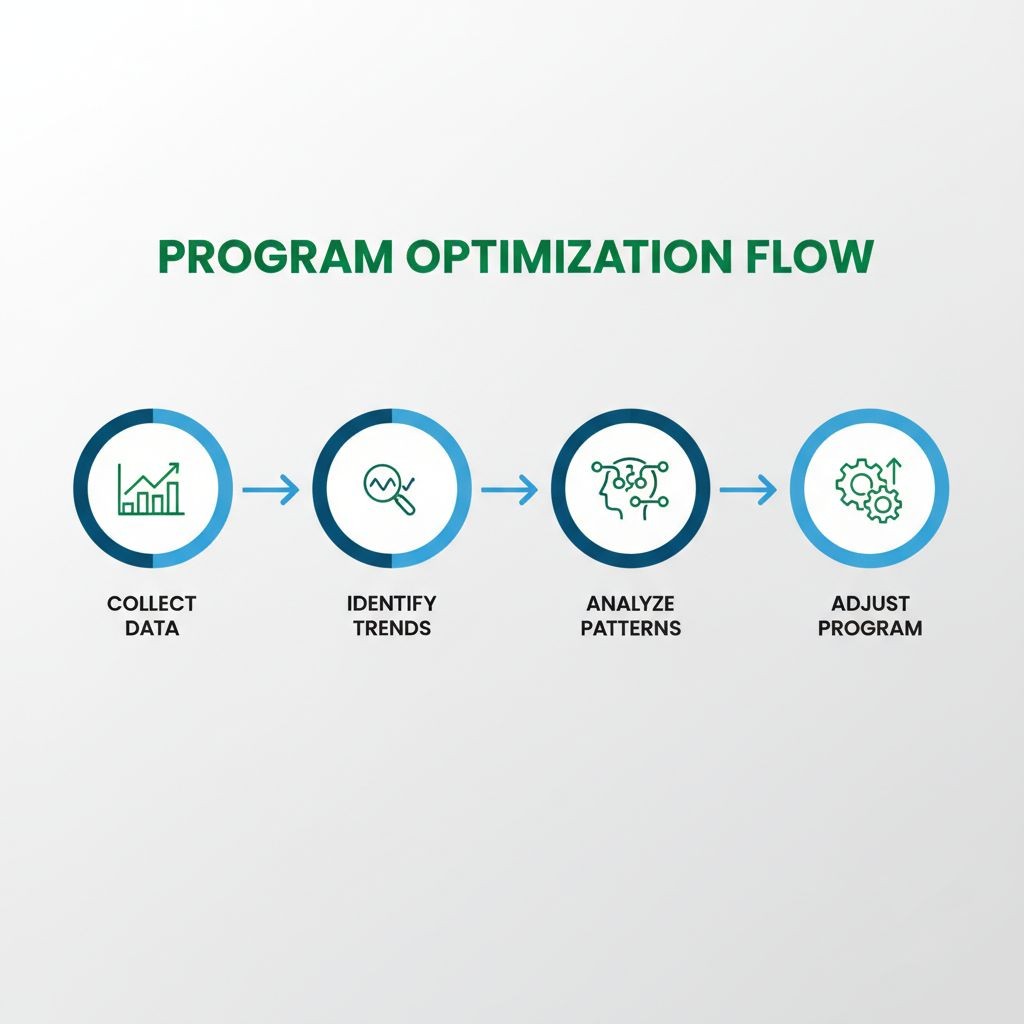
Collecting data is pointless if you don’t know what to do with it. Here’s how to turn numbers into actionable insights.
Look for Trends, Not Daily Fluctuations
Body weight and performance fluctuate with factors such as hydration, food intake, sleep and stress. Compare trends over several weeks under similar conditions rather than treating one reading as a verdict.
For frequently recorded measures such as bodyweight, a weekly average can make a trend easier to see. For exercise performance, compare like sessions rather than averaging together different exercises or rep targets.
Calculate Your Training Volume
Volume load is the sum of load × reps across sets. It can help compare similar sessions on the same exercise, but it does not capture technique, range of motion or effort and is not a direct measure of muscle growth. If you did:
Week 1: Bench Press 3 sets × 8 reps × 185lbs = 4,440 lb-reps of volume load
Week 4: Bench Press 4 sets × 8 reps × 185lbs = 5,920 lb-reps of volume load
The recorded volume load rose by about 33% because you added a set. This is a summary of load and repetitions, not a direct measurement of mechanical work or muscle growth.
Identify Your Response Patterns
Your record can help you investigate questions such as:
Training frequency (which schedule is practical to follow?)
Rep ranges (how does comparable performance change within your chosen range?)
Recovery context (what changes in fatigue and performance accompany the schedule?)
Workload tolerance (are planned sets consistently manageable?)
Charts can summarize logged work and performance. They do not automatically identify your optimal frequency, rep range or recovery needs.
Watch for Plateau Indicators
Patterns worth reviewing include:
Same weights for 3+ consecutive weeks
Decreasing reps at the same weight
Increased perceived effort for same performance
Declining motivation or energy
Increased soreness or recovery time
Review these patterns alongside technique, recovery and program expectations. They may justify an adjustment, but a few repeated sessions do not automatically require a new program.
Compare Across Training Cycles
Don’t just look at week-to-week changes. Compare entire training blocks:
How did your strength progress in this 8-week cycle vs. the last one?
Did changing from 4 to 5 sets improve your results?
Which exercises gave you the best return on investment?
This macro-level analysis helps you refine your approach over time.
Creating Your Personal Tracking System
The best tracking system is the one you’ll actually use. Here’s how to build yours.
Start Minimal, Then Expand
Don’t try to track everything on day one. Begin with:
Week 1-2: Just track exercises, sets, reps, and weight
Week 3-4: Add how you felt (energy level and estimated effort)
Week 5-6: Include rest times and total workout duration
Week 7+: Layer in additional metrics as needed
This gradual approach prevents overwhelm and builds the habit before adding complexity.
Choose Your Primary Method
Pick one main tracking method based on your preferences:
Digital-first: Use an app as your primary tracker, supplement with monthly photos and measurements
Analog-first: Keep a workout journal, take photos monthly, use apps only for specific features (like rest timers)
Hybrid: Log workouts in an app but keep a separate journal for notes, feelings, and insights
There’s no wrong choice. The right system is the one that fits your lifestyle.
Establish Your Review Rhythm
Daily: Quick review of today’s performance vs. last session
Weekly: Check if you’re hitting your target training frequency and volume
Monthly: Analyze trends, take progress photos, record measurements
Quarterly: Assess if your program is working, test performance benchmarks, adjust goals
Consistency in review is as important as consistency in tracking.
Make It Convenient
Remove friction from the tracking process:
Keep your journal and pen in your gym bag
Set up your tracking app before you start your workout
Create templates for your regular workouts
Use voice notes if writing/typing is inconvenient
Schedule progress photos under the same conditions each time
The easier you make it, the more likely you’ll stick with it.
Build in Accountability
Share your tracking with someone:
A workout partner who also tracks
A coach or trainer who reviews your logs
An online community where you post updates
A friend who checks in on your progress
Accountability transforms tracking from a solo activity into a shared commitment.
Common Tracking Mistakes to Avoid
Even experienced lifters fall into these traps. Here’s what to watch out for.
Tracking Too Much Too Soon
The “track everything” approach burns people out fast. You don’t need to log your heart rate variability, sleep score, macros, steps, water intake, and 15 different workout metrics. Start simple. Add complexity only when simple stops working.
Inconsistent Measurement Conditions
Weighing yourself at different times of day, taking photos in different lighting, or measuring body parts in slightly different spots creates false data. Standardize everything. Same time, same conditions, same technique.
Comparing Yourself to Others
Your tracking data is about your progress, not how you stack up against someone else. Someone else’s bench press numbers or weight loss rate is irrelevant to your journey. Compare yourself to your past self, period.
Ignoring Qualitative Data
Numbers matter, but so does how you feel. If your lifts are going up but you’re exhausted, irritable, and dreading workouts, something’s wrong. Track subjective metrics like energy, motivation, and enjoyment alongside the hard data.
Obsessing Over Daily Fluctuations
Your weight will fluctuate. Your strength will vary. You’ll have off days. This is normal human biology, not a crisis. Focus on weekly and monthly trends, not daily data points.
Not Tracking Rest and Recovery
Track rest days and relevant context such as sleep or persistent fatigue alongside performance. These notes can help you review whether your training is manageable, but stalled numbers alone do not identify the cause or diagnose inadequate recovery.
Forgetting to Celebrate Wins
Tracking reveals progress, but only if you actually look for it. When you hit a PR, increase your volume, or notice positive changes in photos, acknowledge it. These wins fuel motivation for the next training block.
Abandoning Tracking During Setbacks
People often stop tracking when they miss workouts, get injured, or fall off their routine. This is exactly when tracking becomes most valuable. Document the setback, track your return to training, and learn from the data about how your body responds to breaks and comebacks.
What to Do When Progress Plateaus
Your tracking data will eventually show a plateau. Here’s how to use that information to break through.
First, Verify It’s Actually a Plateau
A plateau is a persistent lack of progress relative to the goal and timeframe of the program. There is no universal three-to-four-week cutoff. Before changing anything, check:
Has your total volume actually stalled?
Are you comparing the same exercises?
Have you accounted for external factors (stress, sleep, nutrition)?
Sometimes what looks like a plateau is just normal variation.
Analyze What Changed (or Didn’t)
Look back at your tracking data from when you were making progress:
What was your training frequency?
How much volume were you doing?
What was your recovery like?
How was your nutrition and sleep?
Often, plateaus happen because something that was working stopped happening.
Adjust One Variable at a Time
Choose a change based on the pattern you observe:
If the planned reps are becoming manageable, try a small load or rep increase that preserves technique.
If performance is declining and fatigue is high, review recovery and total workload before adding work.
Keep useful exercise variations long enough to compare them; novelty alone is not progression.
If the plan is unclear or progress remains stalled, a qualified coach can help review it.
Change one main variable when practical and track the response. Real-world logs can suggest useful patterns, but they cannot isolate every cause.
Consider a Deload or Rest Week
Sometimes the solution to a plateau is less training, not more. If your tracking shows:
Declining performance across comparable sessions
Persistent fatigue or soreness
Difficulty completing the planned work
Reduced motivation alongside recovery concerns
A lighter training period may help manage fatigue. Reduce the work according to the situation rather than applying one fixed percentage or expecting a guaranteed rebound. Persistent pain or unusual symptoms warrant professional advice.
Reassess Your Goals
Maybe you’ve achieved what’s realistic for your current approach. Your tracking data might show:
Progress that has slowed compared with earlier training
A goal that no longer fits your priorities
A program that needs a clearer progression rule
Slower progress is a reason to review the plan, not proof that you have reached a genetic limit. Decide whether to continue, adjust the approach or get coaching input.
Use Your Data to Experiment
Plateaus are opportunities to test new approaches:
Try a different training split
Experiment with training frequency
Test new exercises or equipment
Adjust your nutrition approach
Record the change and compare several similar sessions. Consider sleep, nutrition and other changes when interpreting the result.
Taking Your Tracking to the Next Level
Once you’ve mastered the basics, these advanced strategies can provide even deeper insights.
Track Training Density
Training density compares work with time. Completing the same work faster can be useful if technique, effort and rest remain appropriate for the goal; shorter sessions are not automatically better strength training.
Monitor Rating of Perceived Exertion (RPE)
Use a consistent effort scale and record it alongside load and reps. Lower perceived effort at the same task can be a useful signal, but it is subjective and does not prove a strength gain by itself.
Calculate Relative Strength
Relative strength is the load lifted divided by bodyweight, using the same units. A 225 lb bench press at 180 lb bodyweight is 1.25 times bodyweight. If the lift stays at 225 lb while bodyweight falls to 175 lb, the ratio rises to about 1.29. If bodyweight and lifted load both stay the same, the ratio stays the same even if body composition changes.
Track Nutrition and Recovery Variables
For serious athletes, tracking workout performance alongside:
Daily protein intake
Sleep hours and quality
Stress levels
Hydration
These records may reveal patterns between lifestyle and training, but a personal log cannot establish a universal sleep or protein threshold or prove what caused a change.
Use Velocity-Based Training
If velocity tracking is already part of your program, record bar speed with the same device, exercise, load and technique. A change in speed needs context, including effort and measurement conditions. Use a defined protocol or coaching guidance instead of automatically adding load whenever one reading is faster.
Implement Periodic Testing Weeks
If formal testing fits your experience and goals, plan it at an appropriate point in the training cycle. You do not need a dedicated maximal-testing week to keep a useful log. Options include:
Max strength (1-3 rep maxes)
Endurance benchmarks
Body composition
Performance tests
This creates clear checkpoints in your data and helps you assess if your program is working.
Setgraph can help you record completed sets and compare exercise history. Keep a simple log of reps, load and relevant notes, and use the result to make an informed next-session decision. Check feature access in your app.
The Bottom Line on Tracking Workout Progress
Tracking your workouts isn’t about obsessing over numbers or turning fitness into a spreadsheet. It’s about creating a feedback system that helps you make better decisions, stay motivated, and actually achieve your goals.
The method doesn’t matter as much as the consistency. Whether you prefer a simple notebook, a sophisticated app, or a combination of approaches, the key is finding a system you’ll use every single workout.
Start simple. Track the basics. Review your data regularly. Adjust based on what you learn. Celebrate your progress. That’s the formula.
A consistent record gives you something concrete to review: what you completed, what changed and what you want to try next. Keep the system small enough that you can maintain it.
Now stop reading and go track your next workout. The best time to start was your first workout. The second best time is right now.
